Skip to content

Website Help Center

How to Build a Blog Page on Your Website

A blog can give your business a place to publish helpful articles, company news, tips, announcements, and other useful information for your customers.

On your Site Before Night website, you can build a simple blog-style section using regular website pages. Your main Blog page acts as an index of article previews, while each complete article lives on its own separate page.

How the setup works: Your Blog page contains a short teaser for each article—typically an image, headline or description, and a button. That button sends the visitor to a separate page containing the complete article.

Step 1: Open your website pages

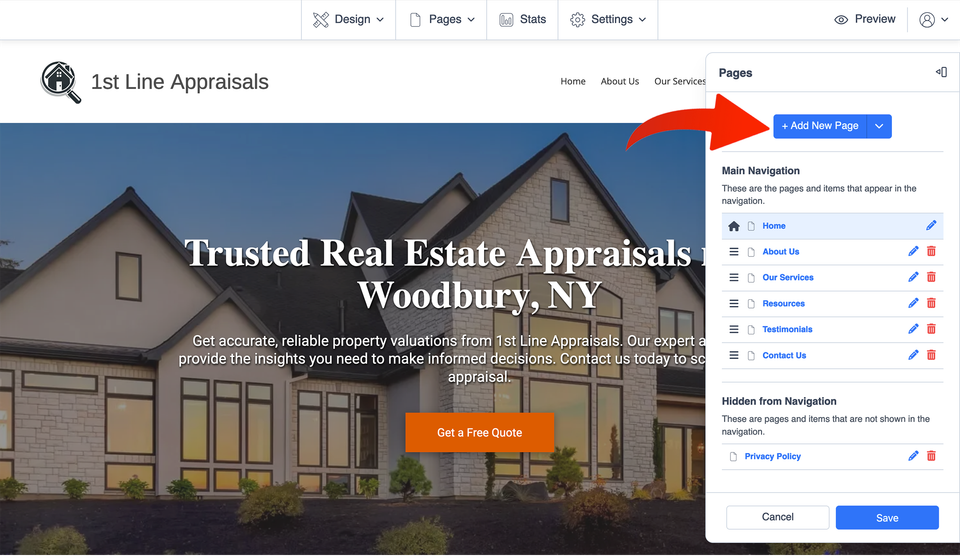
From your website editor, select Pages > Manage Pages. This opens the area where you can add and organize the pages on your website.

H 027 s1 ss1

Add a new page for your blog

In the page manager, select +Add New Page. This new page will become the main landing page where visitors can browse your blog articles.

H 027 s2 ss1

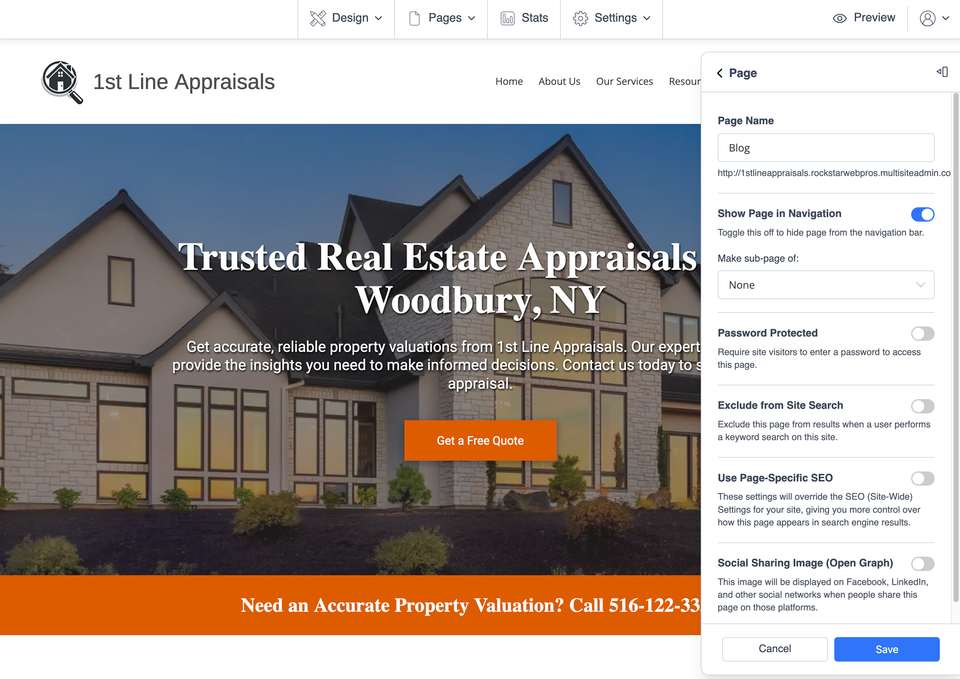
Name your blog page

Name the new page Blog, or choose another title that makes sense for your business.

You might use a name such as News, Articles, Tips, or Resources if one of those better describes what you plan to publish.
H 027 s3 ss1

Add a section for your first article preview

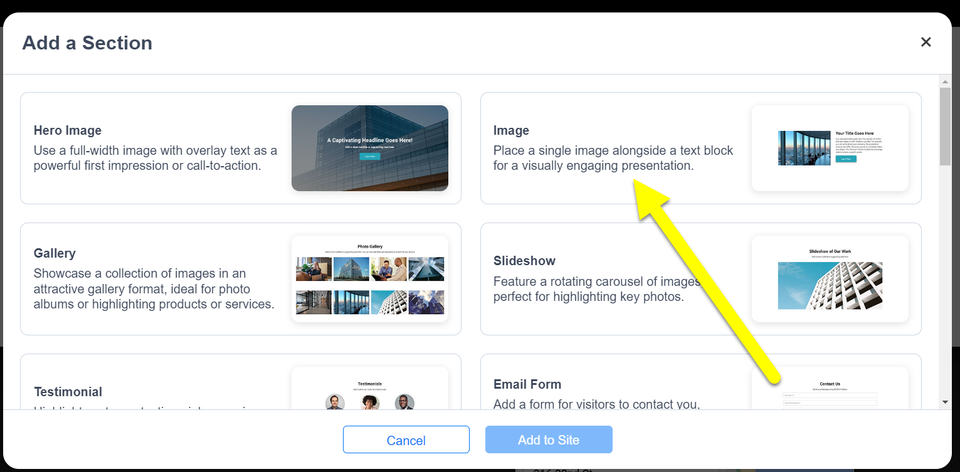
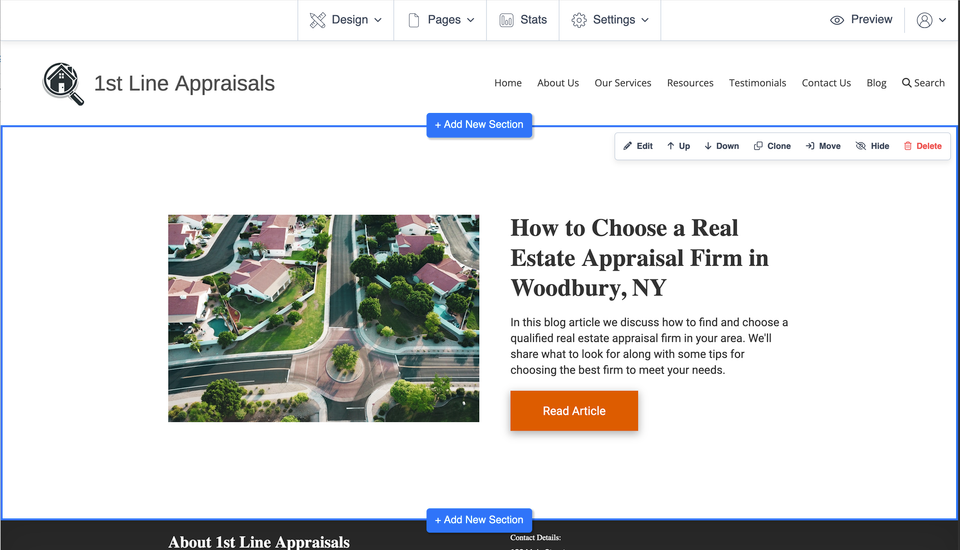
Open your new Blog page and select Add a Section. Choose an Image Section to create a visual preview, or “teaser,” for the article you want visitors to read.

A useful article teaser can include:

  • A relevant article image
  • The article title or a short introduction
  • A few lines explaining what the reader will learn
  • A button that leads to the complete article
H 027 s4 ss1

Build a clear article teaser

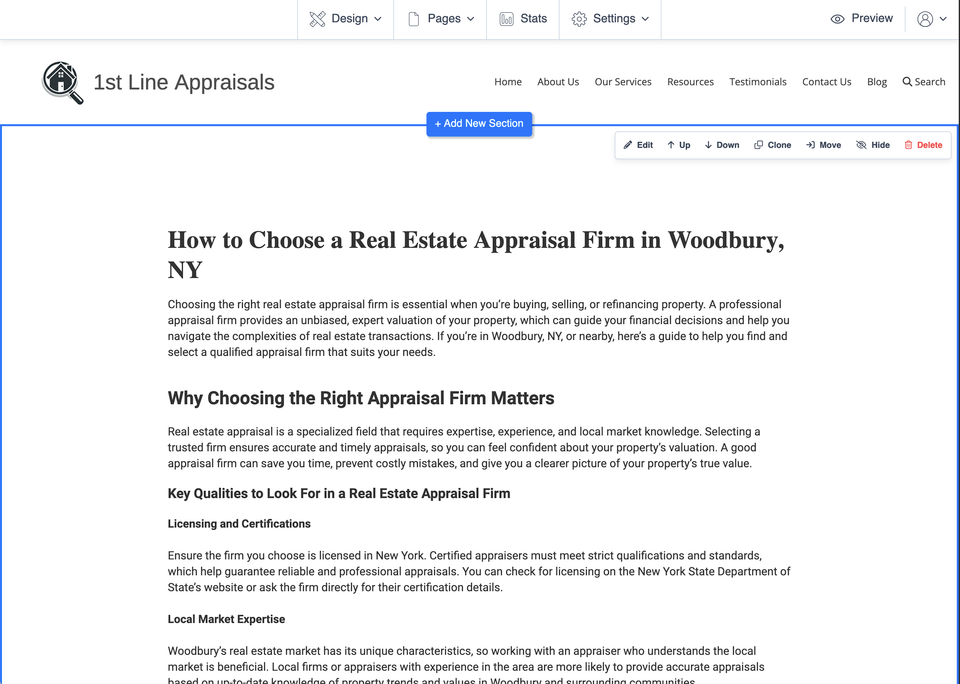
The Blog page is where visitors decide which article they want to open, so keep each preview easy to scan. Use a strong image, a clear title, and enough text to explain why the article is worth reading without placing the entire article on the Blog page.

The teaser button should lead to the separate page containing the full article.

Keep your previews consistent. Using a similar image size, text length, and button style for each article can make the Blog page easier to browse as you add more content.
H 027 s5 ss1

Create a separate page for the full article

Return to your page manager and create another new page. Give this page the title of the individual article. This is where the complete article will live and where the teaser button on your Blog page will send visitors.

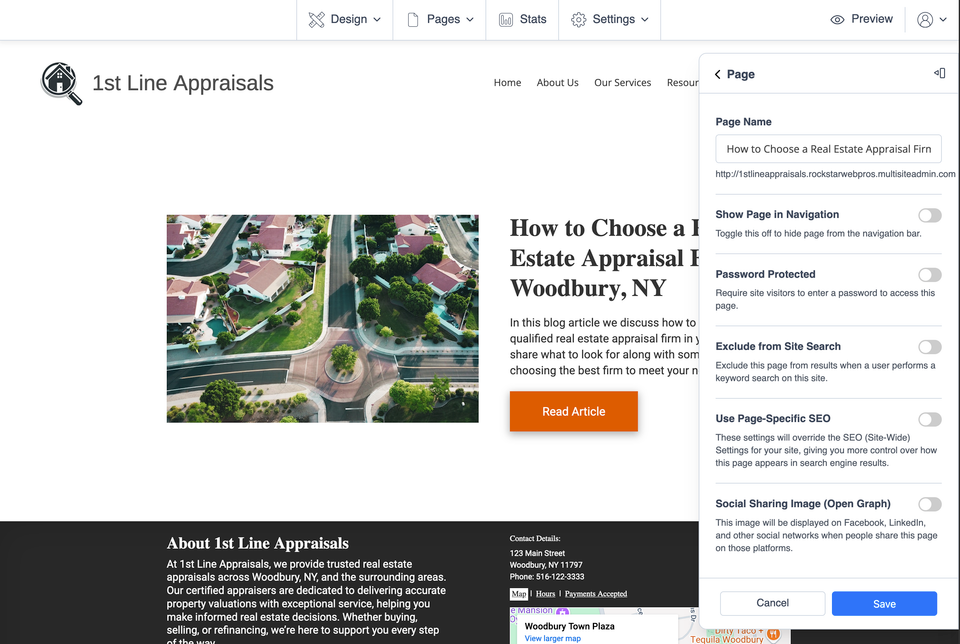
Keep the article page out of your main menu: Turn off Show Page In Navigation for the individual article page. Visitors can still reach the article from the teaser on your Blog page, but your main website menu stays clean and uncluttered.
H 027 s6 ss1

Add the complete article

Navigate to your new article page and select +Add New Section. Use the available text and image section options to build the complete article.

For an easy-to-read article, consider organizing the page with:

  • A clear article title
  • A short introduction
  • Helpful headings that divide longer topics
  • Relevant images where they improve the explanation
  • Short paragraphs that are comfortable to read on a phone
H 027 s7 ss1

Add new articles using the same pattern

Whenever you publish another article, add a new teaser to your main Blog page and create a separate page for the complete article. Keep the individual article page out of the main navigation, then link the teaser button to it.

Is this an automatic blogging system?

This workflow uses ordinary website pages and sections. You manually add each new article teaser and its corresponding article page.

Does every article need a separate page?

Yes. In this setup, the Blog page provides article previews while each full article is placed on its own page.

Should article pages appear in my main menu?

No. Turn off Show Page In Navigation for individual article pages so your main menu does not become crowded.

Can the main page be called something besides Blog?

Yes. You can use another name that fits your content, such as News, Articles, Tips, or Resources.