Skip to content

Website Help Center

How to Create a Dropdown Menu

A dropdown menu lets you group related website pages beneath one navigation label. It can make your menu easier to scan while still giving visitors quick access to individual pages.

Example: If your business has several service pages, you could create a dropdown called Services and place each individual service page underneath it.

Start in Manage Pages

From your website editor, open Pages and select Manage Pages. This is where you can organize your website pages and navigation.

H 020 s1 ss1

Add a New Dropdown Menu

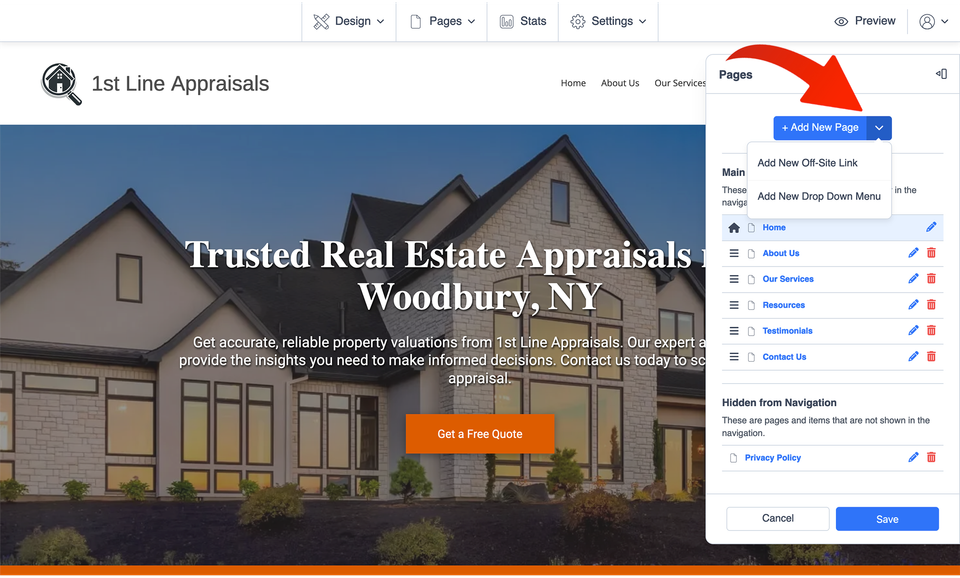
Find + Add New Page and select the down arrow beside it. From the additional options that appear, choose Add New Drop Down Menu.

H 020 s2 ss1

Name Your Dropdown

Enter the name you want visitors to see in your website navigation. When the name is correct, save your changes.

Keep the label simple. Names such as “Services,” “About,” or “Resources” help visitors understand what they will find inside the menu.

H 020 s3 ss1

Choose a Page to Place Under the Dropdown

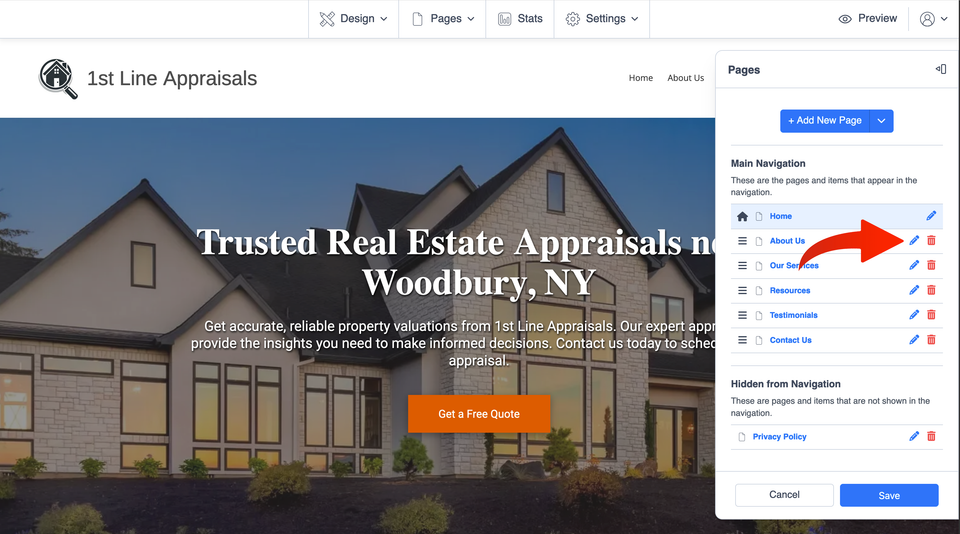
In your page list, find the page you want to place beneath the new dropdown menu. Select the pencil icon beside that page to open its settings.

H 020 s4 ss1

Make the Page a Sub-Page

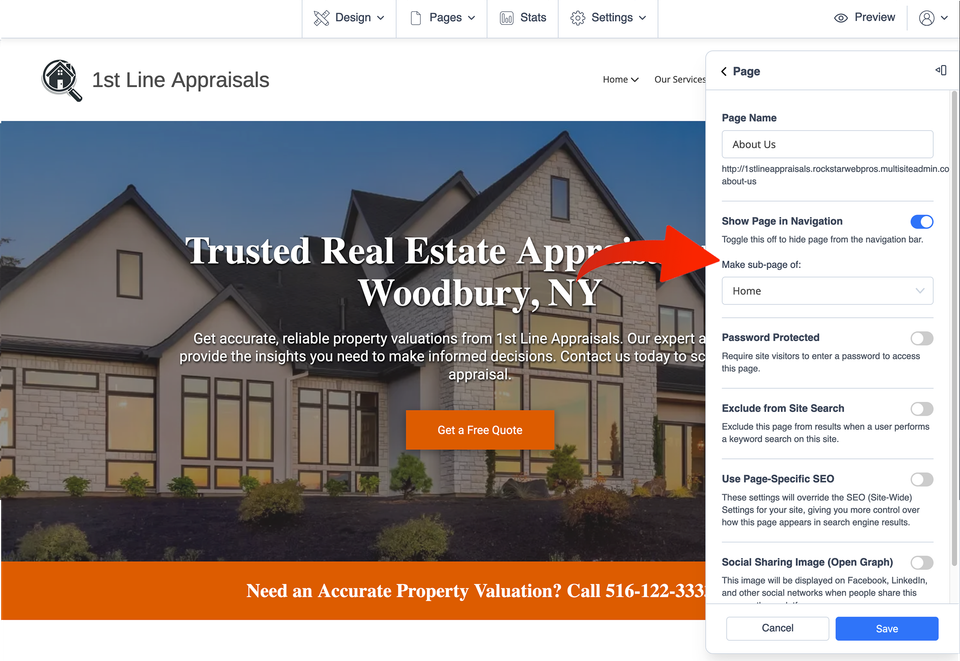
Find the Make a sub-page of option and choose the dropdown menu you just created. Save the page when you are finished. Repeat this process for each additional page you want to include beneath the same dropdown.

H 020 s5 ss1

Keep Your Navigation Easy to Understand

Once your sub-pages are saved, review your website navigation and make sure the dropdown is organized the way you want it. A good dropdown helps visitors find related information without making your main menu feel crowded.

  • Use a short, descriptive name for the dropdown.
  • Group pages that clearly belong together.
  • Avoid adding unrelated pages simply to reduce the number of main menu items.
  • Check the finished navigation so your page names make sense to a first-time visitor.